As a business, the ability to send money to a beneficiary account quickly and smoothly ensures easy business operations.
Before now, all disbursements to third-party accounts were only done via API. On the Monnify dashboard UI, a merchant could only disburse funds to the account number linked to their accounts as a withdrawal, restricting third-party transactions solely to API usage. We are now introducing the Transfer UI which allows merchants to make single and bulk transfers to third-party accounts.
This means merchants can easily pay suppliers or salaries or any other business payments from their dashboard. Let’s explore how you can use the Transfer UI and Workflow features via your Monnify dashboard and its various functionalities.
What is Monnify’s Transfer UI?

Have you ever wished that making business transfers were as easy as a few clicks? You bet! The Monnify’s Transfer UI feature allows you, as a Monnify merchant, to conveniently transfer money to a third-party account of your choice without the hassles of API usage.
This new feature enables merchants to transfer to third-party accounts not linked to their accounts for withdrawal. Ultimately, this gives merchants flexibility, speed, and convenience during business operations.
A merchant can carry out the following:
- Single Transfers: A merchant can perform individual transfers to a beneficiary
- Bulk Transfers: A merchant can perform multiple transfers to various beneficiaries in a single operation.
How can I use Monnify’s Transfer UI?
To get started using the Monnify’s Transfer UI feature as a merchant, follow these steps:
- Log into your Monnify account or sign up if you don’t have an existing Monnify account
- Fund your Monnify wallet by doing a transfer to your wallet top-up account number displayed on your dashboard
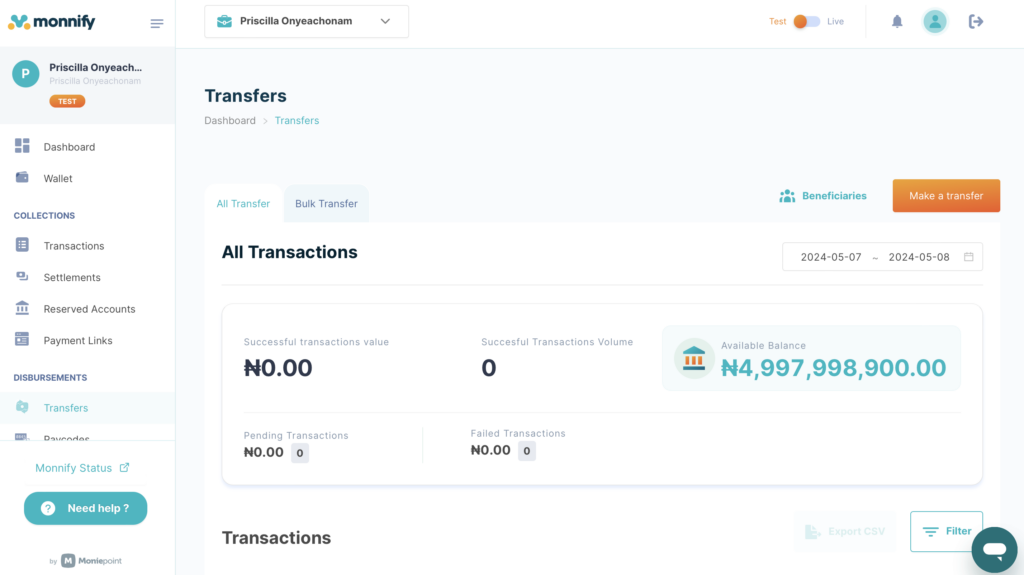
- Navigate to the “Transfers” menu tab on your dashboard
Using Single Transfer

Once you are on the Transfers menu page,
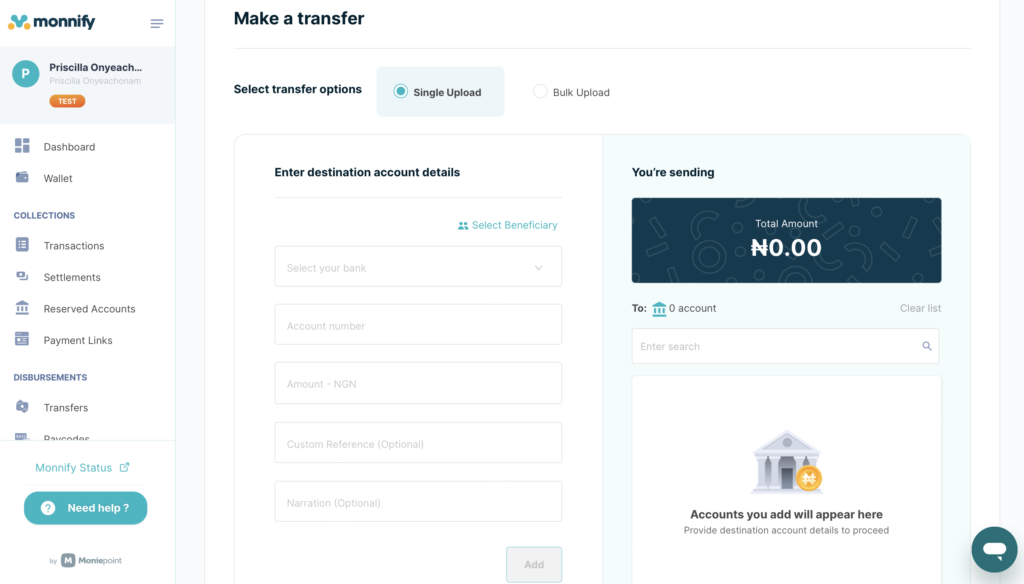
- Click on the “Make transfer” button.
- Navigate to the single upload tab.
- Enter the recipient’s details, including destination bank, account number, transfer amount, reference (optional) and narration (optional)
- Click on the “add” button.
- Review the information supplied to ensure accuracy.
- Click on the “make transfer” button to process the transfer.
When Using the Bulk Transfer Option

Once you get to the Transfers menu page,
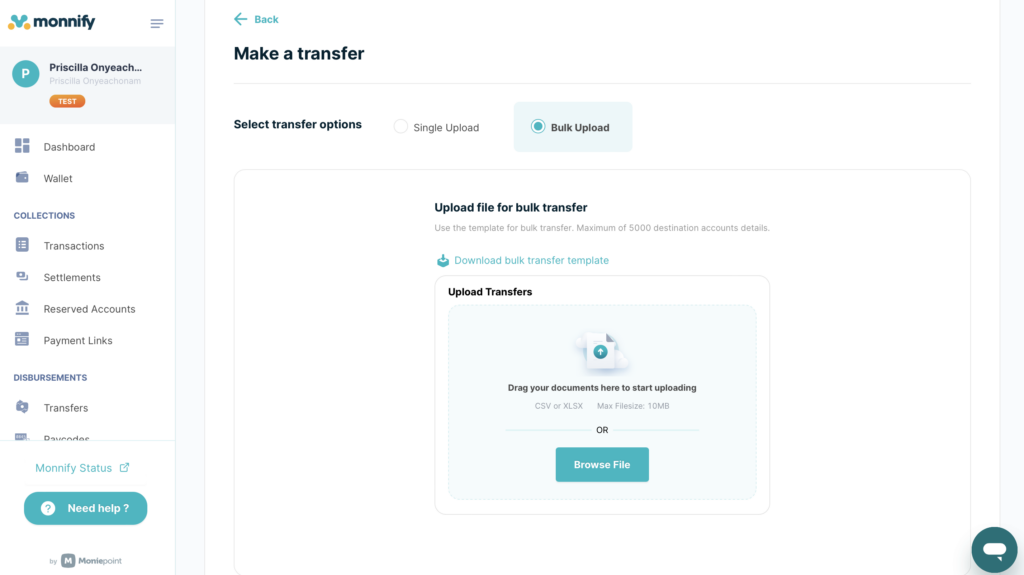
- Click on the “make transfer” button.
- Navigate to the bulk upload tab.
- Upload a CSV/Excel file containing all beneficiary details with the following format and fields: Account_Name |Bank_Code | Account_Number |Amount |Reference (optional) | Narration.
- Click on the “Proceed” button to preview your upload list.
- Review the information supplied to ensure accuracy.
- Click on the “proceed” button to process the transfer.
Workflow for Transfers
To ensure security and control when making transfers from the dashboard, we have introduced the Monnify Workflow feature
With Workflow, all transactions on the merchant’s Monnify dashboard undergo a structured two-step approval, ensuring accountability in processing transactions. Any requests initiated from the dashboard eventually go through a workflow involving two users, which are;
- Initiator: The initiator is responsible for initiating the transaction request on the dashboard. i.e. transfers, refunds. A user can find all requests they initiate on the “My request” section of the dashboard.
- Approver: The approver reviews the request made by the initiator before subsequently approving it for processing. All pending request approvals can be found in the “Pending approval” section of the dashboard.
To have the feature enabled for your business, reach out to us at [email protected]
